How to Use Background Images in Email Templates
The Guide for Using Bulletproof Background Images in HTML Email Templates.

Many years ago, I worked as a Full-Stack Developer. My work also included website development. Despite having little experience in creating simple email templates, I had already known that I had to use a table layout. But, back then, I never really worked on developing email templates seriously.
At that time, a friend of mine asked me to help her with an email template. I looked at the mockup she sent me and responded to her by saying, "No problem. Give me an hour." However, even after 3 hours, I was still working on that same template. So, the mockup was pretty simple. It had some text, a button, and a couple of images. There was just one problem––a portion of the text was above the image. Furthermore, that text had a placeholder with a client name. It means there was no way to draw the text into the image.
My first idea was using absolute positioning for the image and the text as I did many times on regular webpages. It looked something like this:
<div style="position: relative; text-align: center; width: 630px">
  <img src="cid:back.jpg" style="position: absolute; top: 0; left: 0"/>
  <h1 style="position: absolute; width: 100%; margin-top: 30px">My template is awesome</h1>
</div>
Of course, it didn't work. Most email clients don't support absolute positioning at all. Then I tried to use the background-image: url('image_url') style and outdated tag background="image_url" for the div container:
<div style="text-align: center; width: 630px; height: 420px; background-image: url('cid:back.jpg'); padding: 30px; box-sizing: border-box">
  <h1>My template is awesome</h1>
</div>
or for the table cell:
<table cellpadding="0" cellspacing="0" border="0" width="100%">
  <tr>
    <td style="height: 480px; background-image: url('cid:back.jpg'); background-repeat: no-repeat; background-position: top center; background-size: cover; text-align: center; vertical-align: top; padding: 20px; box-sizing: border-box;">
      <h1>My template is awesome</h1>
    </td>
  </tr>
</table>
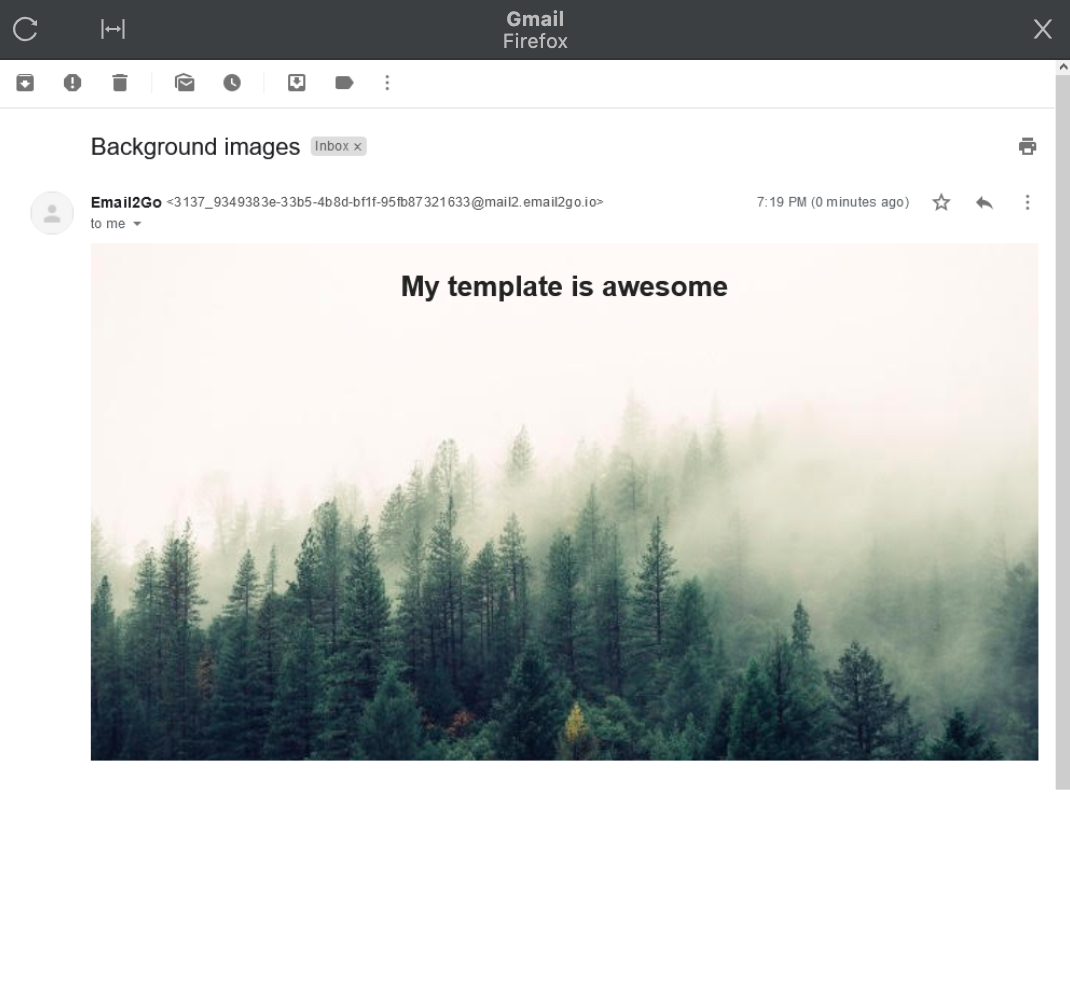
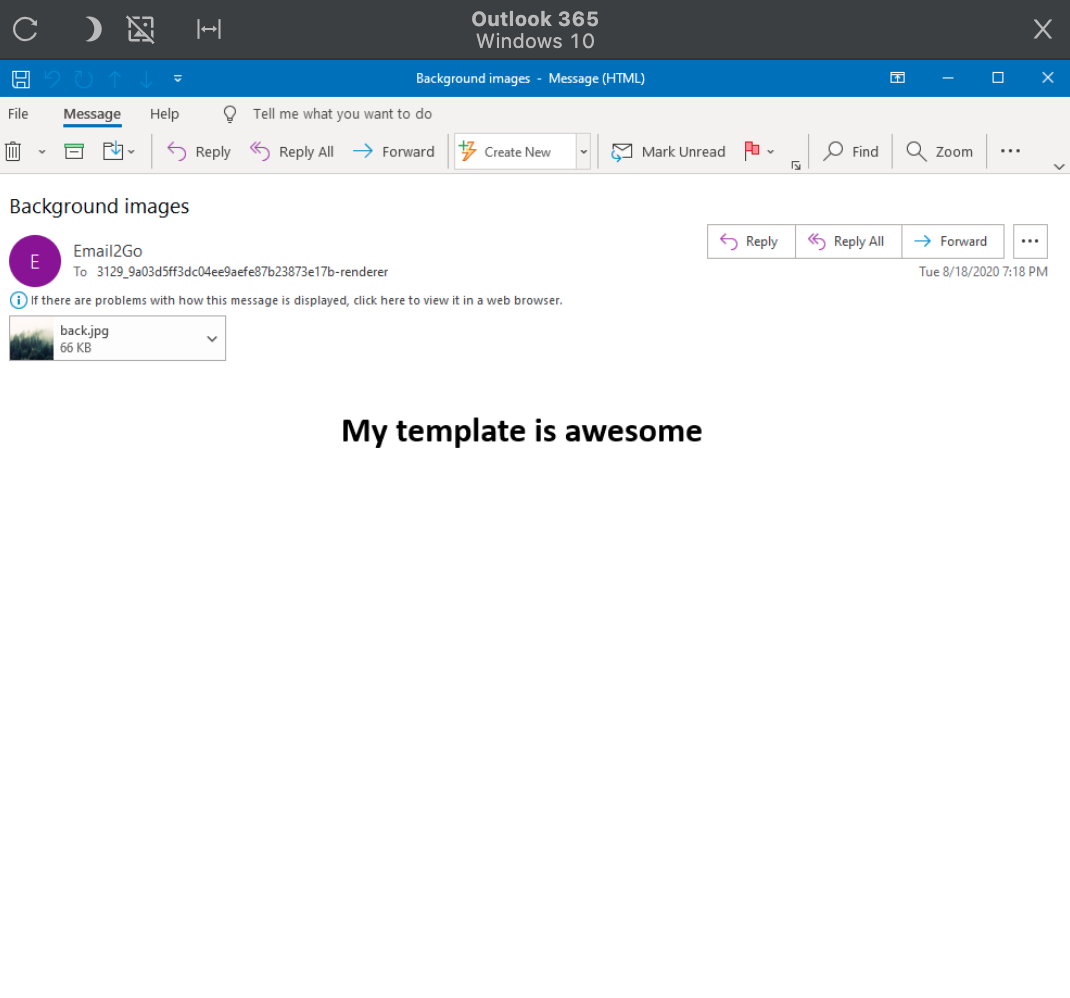
It was a very nice and easy solution. Using different values of background-repeat, background-position, background-size parameters gave me what I wanted. This way worked in many mail clients except for Microsoft Outlook.
 Gmail, Firefox
 Outlook 365, Windows 10
This unfortunate problem of Outlook can be solved by using Vector Markup Language (VML). Let's try to do it together.
and test them on dozens of different devises and mail apps START NOW


Bulletproof Background Image
This method is based on using Microsoft’s Vector Markup Language (VML). I'm going to create a VML layer with our background image for Outlook clients. Also, I'll use a background-image style in the table cell for non-Outlook clients. This method is well-known as "Bulletproof Background Image." It provides us two options: a) Tiling the background image in the full email window; b) Tiling the background image in a restricted part of a table-based layout. I’ll put all the VML code in Outlook-specific conditional comment. In my experiment, I'll use the Email Template Testing Tool by Email2Go. Also, I'm going to use Embedded Images. It will help me avoid a problem with situations when images are turned off.
Option 1 – For full email body
<body>
  <div>
    <!--[if gte mso 9]>
    <v:background xmlns:v="urn:schemas-microsoft-com:vml" fill="t">
      <v:fill type="tile" src="cid:back.jpg"/>
    </v:background>
    <![endif]-->
    <table height="100%" width="100%" cellpadding="0" cellspacing="0" border="0">
      <tr>
        <td valign="top" align="left" style="height: 480px; background-image: url('cid:back.jpg'); background-repeat: no-repeat; background-position: top center; background-size: cover; text-align: center; vertical-align: top; padding: 20px; box-sizing: border-box;">
          <h1>My template is awesome</h1>
        </td>
      </tr>
    </table>
  </div>
</body>
Option 2 – For a single table cell
<table cellpadding="0" cellspacing="0" border="0" width="100%">
  <tr>
    <td style="width: 630px; height: 480px; background-image: url('cid:back.jpg'); background-repeat: no-repeat; background-position: top center; background-size: cover; text-align: center; vertical-align: top; padding: 20px; box-sizing: border-box;">
      <!--[if gte mso 9]>
      <v:rect xmlns:v="urn:schemas-microsoft-com:vml" fill="true" stroke="false" style="width:630px;height:480px;">
        <v:fill type="tile" src="cid:back.jpg" />
        <v:textbox inset="0,0,0,0">
        <![endif]-->
        <div>
          <h1>My template is awesome</h1>
        </div>
        <!--[if gte mso 9]>
        </v:textbox>
      </v:rect>
      <![endif]-->
    </td>
  </tr>
</table>
The presented code snippets are simplified for easier explanation. You have to adapt them to your template.
Also, you have to know the Microsoft Windows Mail App doesn't display images located above other ones even when images are turned on.
But the biggest issue is the last versions of Microsoft Outlook totally ignore some text styles in Dark Mode and invert colors. So, in some cases, you can get a dark font on a dark background image. That's why using background images is very limited. I recommend you use them only if it is justified.
If you have any solutions for the Dark Mode issue, please leave a message in the comments below.
If you need to put a Button above a Background Image you can find a solution in my other article about Bulletproof Buttons.

